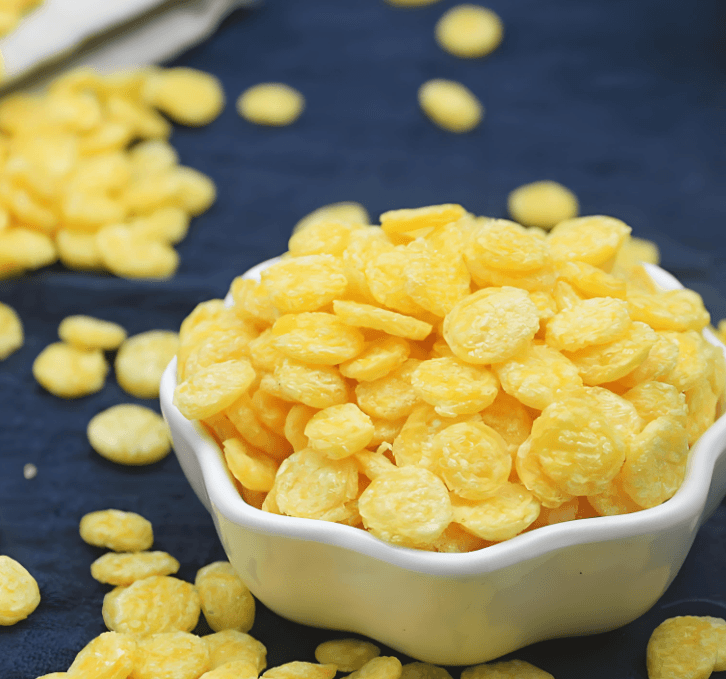
The Alchemy of Breakfast: A Comprehensive Guide to the Six Essential Elements of Corn Flake Production
Breakfast cereal, particularly the iconic corn flake, is a staple in households worldwide. Its simplicity belies a remarkably complex and precise manufacturing process. corn flakes making machine What begins as a humble kernel of maize is transformed through a series of engineered steps into a uniform, crisp, flavorful, and shelf-stable flake. This transformation is not merely a matter of recipe but of controlled chemistry, physics, and engineering. The production of a high-quality corn flake is a symphony of interdependent variables, where a misstep in any single element can lead to a product that is too dense, too fragile, lacking in flavor, or prone to rapid spoilage.
This definitive guide will dissect the corn flake manufacturing process into six fundamental, interconnected elements. We will explore each in exhaustive detail, from the molecular-level changes in the grain to the macro-scale engineering of the production line. corn flakes making machineUnderstanding these elements is key to appreciating the science behind this ubiquitous food and to mastering its production.
Element 1: Raw Material Selection and Preparation: The Foundation of Quality
The journey of a corn flake begins long before it reaches the manufacturing facility. The selection and initial preparation of the raw material—the corn itself—set the ultimate ceiling for product quality. This stage is arguably the most critical, as no subsequent process can compensate for fundamentally inferior raw materials.
1.1. The Maize Kernel: A Marvel of Natural Engineering
Not all corn is created equal. While field corn (dent corn) is the primary type used for corn flakes, specific hybrids are often selected for their optimal characteristics. The kernel itself is a complex structure, and each component plays a role:
- Pericarp (Hull/Bran): The tough, fibrous outer layer. It is rich in insoluble fiber and, while nutritious, can impart a darker color and a coarse texture if not properly removed. Its removal is a key objective in early processing.
- Germ: The embryo of the seed, rich in lipids (oil), proteins, vitamins, and minerals. While nutritionally valuable, the germ is a problem for shelf stability. Its high oil content is susceptible to oxidative rancidity, which can lead to off-flavors and a shortened shelf life. For this reason, the germ is almost entirely removed in the production of traditional, shelf-stable corn flakes.
- Endosperm: This constitutes about 82% of the kernel’s dry weight and is the primary raw material for corn flakes. It is composed primarily of starch granules embedded in a protein matrix. The endosperm is divided into two regions:
- Horny (Vitreous) Endosperm: This is hard, flinty, and dense. It has a higher protein content which creates a stronger, more rigid structure.
- Floury (Soft) Endosperm: This is softer, chalky, and contains more air spaces. It is easier to mill but produces a less robust particle.
The ideal corn for flaking has a high proportion of hard, vitreous endosperm. This results in grits that are more durable during processing and yield a stronger, crisper final flake.
1.2. The Milling Process: Creating the Perfect Grit
Whole corn kernels are not used to make flakes. Instead, they are milled into corn grits—uniform, coarse granules of pure endosperm. corn flakes making machineThis is achieved through a process known as dry milling, specifically the “degerming” system.
- Cleaning and Tempering: Upon arrival at the mill, the corn is thoroughly cleaned to remove dust, stones, chaff, and metallic particles. It is then “tempered” by adding a small amount of water and allowing it to rest for several hours. This conditioning step is crucial: it toughens the bran and mellows the endosperm, making the subsequent separation of components more efficient.
- Degermination: The tempered corn passes through a degerminator, a machine that uses abrasion and impact to break the kernels apart. The goal is to cleanly separate the brittle germ and the fibrous bran from the large chunks of endosperm.
- Sorting and Purification: The resulting mixture of germ, bran, and endosperm particles of various sizes is passed over a series of screens and aspirators. The germ and bran are diverted for use in other products (e.g., corn oil, animal feed). The endosperm particles are sorted by size. The large, uniform pieces of endosperm are the premium corn grits destined for corn flake production. Smaller particles and cornmeal are used for other applications like corn bread or other cereal types.
The quality of the grit is paramount. They must be of a consistent, specified size (e.g., passing through a #8 sieve but held on a #10 sieve) and have a low fat content (typically less than 1%) to ensure shelf stability and uniform cooking. The presence of any residual bran or germ specks will be visible as imperfections in the final, translucent flake.
Element 2: Cooking and Gelatinization: The Transformation of Starch
This is the stage where the physical grit is transformed at a molecular level, becoming malleable and ready for flaking. The cooking process is about much more than just making the grits soft; it is about fundamentally altering the starch structure.
2.1. The Batch Rotary Cooker: A Pressure Cooker on an Industrial Scale
Traditionally, corn grits are cooked in large, rotating, cylindrical pressure vessels known as batch rotary cookers. The grits are loaded into the cooker along with a precise mixture of ingredients:
- Water: The medium for heat transfer and the agent of hydration.
- Flavoring Syrups: Typically a blend of sugar (sucrose), malt syrup (from barley), and salt. The malt syrup provides diastatic enzymes (amylases) and a distinct, nutty flavor. The sugar not only adds sweetness but also plays a role in the browning reaction (Maillard reaction) during toasting and contributes to the final flake’s texture and shelf life.
- Other Additives: Sodium bicarbonate may be added to adjust the pH, which can affect the rate of gelatinization, the Maillard reaction, and the final color.
The cooker is sealed, and steam is injected, raising the internal temperature to around 120-150°C (250-300°F) at pressures of 15-30 psi. corn flakes making machineThe rotation ensures even heat distribution and prevents the grits from sticking together. The cook time can last from one to two hours.
2.2. The Science of Starch Gelatinization
Inside the pressurized, humid environment of the cooker, a profound transformation occurs within the endosperm particles.
- Hydration and Swelling: Water penetrates the grit, and the starch granules within the endosperm begin to absorb it.
- Granule Disruption: As the temperature rises, the molecular bonds within the starch granules (amylose and amylopectin) begin to break.
- Gelatinization: At a specific temperature (the gelatinization temperature, which for corn starch is around 62-72°C or 144-162°F), the granules lose their crystalline structure, swell irreversibly to many times their original size, and leach out amylose molecules. The granules rupture, and the starch polymers form a continuous, viscous, gelatinized network.
- The Role of the Protein Matrix: The protein that encases the starch granules also denatures during cooking, further contributing to the softening of the grit and becoming part of the new, cohesive matrix.
The end result is a fully cooked “cereal grit.” It is no longer a hard, dry particle but a soft, plastic, and semi-translucent mass. The individual grits have swollen and become soft and malleable, but they must still retain their distinct identity and not disintegrate into a porridge. The precise control of time, temperature, and ingredient ratio is critical to achieving this perfect state of cook.
Element 3: Delumping and Drying: Achieving the Ideal Moisture Content for Flaking
Upon discharge from the cooker, the cooked grits are agglomerated into a large, sticky, and hot mass. They are also too moist for flaking. This element involves preparing the cooked material for the physical act of flaking.
3.1. Delumping (or Delumping)
The hot mass from the cooker is passed through a delumping device, often a rotating drum with internal baffles or a coarse mesh screen. This breaks apart the large clumps into individual, or small clusters of, cooked grits. This step is essential to ensure uniform drying and, later, uniform flaking.
3.2. The Critical Drying Phase: Tempering
The delumped grits now have a moisture content that is too high for flaking—typically around 28-32%. If rolled at this moisture level, they would simply form a sticky, paste-like sheet that would tear and stick to the rollers. Therefore, they must be partially dried to a specific, narrow moisture window.
- Drying Process: The grits are conveyed through a continuous, multi-pass dryer, where they are exposed to a controlled flow of hot air. The temperature and airflow are carefully managed to remove surface moisture without creating a hard, crusty exterior.
- The Target Moisture: The goal is to reduce the moisture content to a precise level, typically between 16% and 22%. This is the “plastic range” for the cooked grit.
- Moisture Equilibrium (Tempering): After drying, the grits are often held in a “tempering bin” or on a slow-moving conveyor for several hours. This resting period is crucial. It allows for the moisture within each grit to equilibrate—moisture from the wetter interior migrates to the drier exterior, creating a uniform moisture profile throughout every single grit. Without proper tempering, the flakes would be inconsistent: some might be too brittle and shatter, while others might be too soft and not form a distinct flake.
Achieving this ideal, uniform moisture content is what allows the grit to deform plastically under the pressure of the flaking rolls without fracturing or sticking. It is a masterpiece of process control.
Element 4: Flaking: The Defining Physical Transformation
This is the eponymous step where the prepared grit is physically transformed into a flat flake. It is a seemingly simple mechanical process that requires immense precision.
4.1. The Flaking Rolls
The heart of the flaking operation is a pair of massive, precisely machined rolls.
- Construction: These rolls are typically made from chilled cast iron, which has a hard, durable surface and excellent heat transfer properties. They can be several feet in length and weigh many tons.
- Surface Finish: The rolls have a mirror-smooth, highly polished surface. Any imperfection would be transferred to the flake’s surface. The finish is critical to prevent the sticky, plastic grit from adhering to the roll.
- Temperature Control: The rolls are often temperature-controlled, usually cooled with internal water circulation. This is vital for preventing the cooked grit from sticking to the roll surface due to heat.
4.2. The Physics of Flaking
The tempered grits are fed by a gravity chute into the “nip”—the narrow gap between the two counter-rotating rolls.
- Compression and Shearing: As a grit enters the nip, it is subjected to tremendous compressive force, on the order of several tons per linear inch. This force flattens the spherical or irregularly shaped grit into a thin, flat sheet.
- Deformation: The starch-protein matrix, now in its ideal plastic state due to the precise moisture content, deforms and flows rather than fracturing. The rollers essentially “iron” the grit into a flake.
- Thickness Control: The gap between the rolls is meticulously controlled, often to within thousandths of an inch. This gap determines the final thickness of the flake, which is a primary factor in its texture and mouthfeel. A thicker flake will be harder and more durable; a thinner flake will be more delicate and crisp.
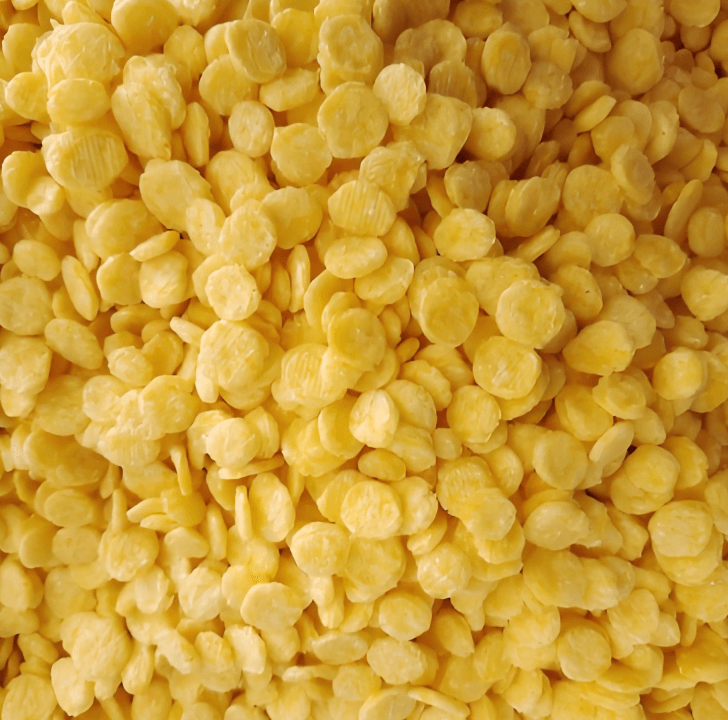
The resulting product exiting the rolls is a flat, warm, and still-pliable corn flake. At this stage, it is not yet crispy but has acquired its characteristic shape and size. corn flakes making machine The success of this step is entirely dependent on the perfect execution of the previous three elements: a high-quality grit, perfectly cooked and gelatinized, and dried to an exact and uniform moisture content.
Element 5: Toasting and Drying: Developing Flavor, Texture, and Shelf-Stability
The flakes that emerge from the flaking rolls are pliable and moist. The toasting process is what creates the final crisp texture, the golden-brown color, and the signature toasted flavor.
5.1. The Toasting Oven
Flakes are conveyed through a continuous, multi-zone oven, typically a conveyor belt that passes through several independently controlled temperature zones. This is often a long, tunnel-like apparatus.
5.2. The Concurrent Physical and Chemical Changes
As the flakes travel through the oven, several critical transformations occur simultaneously:
- Moisture Removal (Drying): The primary function is to rapidly remove the remaining moisture, reducing it from ~18% down to a final moisture content of 1-3%. This rapid dehydration is what creates the rigid, porous, and crispy structure of the flake. The steam escaping from within puffs the flake slightly, creating the characteristic airy texture.
- Color and Flavor Development (Maillard Reaction and Caramelization): This is the flavor-development stage. The oven’s high temperature (typically 300°C / 575°F or higher at the inlet) triggers two key chemical reactions:
- Maillard Reaction: This is a complex reaction between reducing sugars (from the added sugar and malt syrup) and amino acids (from the protein in the corn). It produces a vast array of flavor and aroma compounds, resulting in the nutty, toasted, and complex flavors associated with corn flakes. It is also responsible for the desirable golden-brown color.
- Caramelization: The direct pyrolysis of sugars at high temperatures also contributes to color, flavor (butterscotch, caramel notes), and bitterness in a controlled amount.
- Puffing and Structure Setting: The rapid vaporization of internal moisture creates steam pressure within the flake, causing it to puff slightly. As the moisture flashes off, the starch-protein matrix sets into a rigid, glassy state, locking in the flake’s final shape and texture.
The toasting process must be precisely controlled. Under-toasting results in a pale, bland, and often tough flake. Over-toasting leads to a dark brown color, a bitter, burnt flavor, and an overly fragile structure that generates too many “fines” (small broken pieces).
Element 6: Coating, Cooling, and Packaging: The Final Touches for Quality and Consumer Appeal
After toasting, the flakes are hot, fragile, and not yet ready for the package. corn flakes making machine The final element involves adding optional enhancements, stabilizing the product, and protecting it until it reaches the consumer’s bowl.
6.1. Coating and Fortification
As the hot flakes exit the toaster, they pass through a coating reel—a rotating drum.
- Nutrient Fortification: A fine mist or powder containing vitamins (e.g., B vitamins, Vitamin D) and minerals (e.g., iron) is often applied. The residual heat and surface stickiness of the flakes help this coating to adhere. This “enrichment” is a major public health benefit, restoring nutrients lost during milling and adding others.
- Flavor and Sweetener Coatings: For sweetened varieties, a syrup made of sugar, honey, or other sweeteners, along with flavorings, is sprayed onto the tumbling flakes. The hot flakes cause the water in the syrup to evaporate, leaving a thin, glossy layer of sweetener on the surface.
6.2. Cooling
The hot, coated flakes (often over 120°C / 250°F) must be cooled immediately to ambient temperature. They are conveyed through a cooling tunnel, where ambient or slightly cooled air is blown over them.
- Preventing Condensation: If packaged hot, moisture would condense inside the bag, leading to sogginess and microbial growth.
- Texture Stabilization: Cooling finalizes the rigid, glassy state of the starch, ensuring the flake remains crisp.
6.3. Packaging: The Final Barrier
Packaging is the final, crucial step in preserving the quality painstakingly built through the previous five elements.

- Protection from the Environment: The primary enemies of breakfast cereal are moisture, oxygen, and light. The packaging must be an effective barrier against all three.
- Inline Processing and Filling: Flakes are conveyed directly to the packaging line, where they are weighed and filled into bags, which are typically made from a multi-layered plastic polymer (e.g., polypropylene) with a metallized layer for an oxygen and light barrier.
- Gas Flushing: To extend shelf life and prevent oxidative rancidity (of any residual lipids) and staling, the air inside the bag is often displaced with an inert gas, such as nitrogen, before sealing. This “nitrogen flushing” creates a protective atmosphere inside the package, keeping the flakes fresh and crisp for months.
The sealed bags are then cartoned for additional physical protection and branding, ready for distribution.
Conclusion: The Symphony of Six Elements
The production of a corn flake is a testament to food engineering. It is not a single process but a chain of six meticulously controlled and interdependent elements.corn flakes making machine Each stage builds upon the success of the previous one:
- Selection & Milling provides the pure, stable canvas.
- Cooking & Gelatinization transforms the internal structure.
- Drying & Tempering achieves the perfect physical state for deformation.
- Flaking creates the iconic form.
- Toasting develops the final flavor, color, and texture.
- Coating, Cooling, & Packaging locks in quality and delivers it to the consumer.
A failure in any single element—using poor-quality corn, imprecise cooking, incorrect moisture before flaking, misaligned rolls, inconsistent toasting, or permeable packaging—will reverberate through the entire process, resulting in an inferior product. The perfect corn flake, therefore, is not an accident but the inevitable result of mastering this intricate and beautiful alchemy of science and engineering.