Comprehensive Guide: How to Clean a Food Extruder (Twin-Screw / Single-Screw)
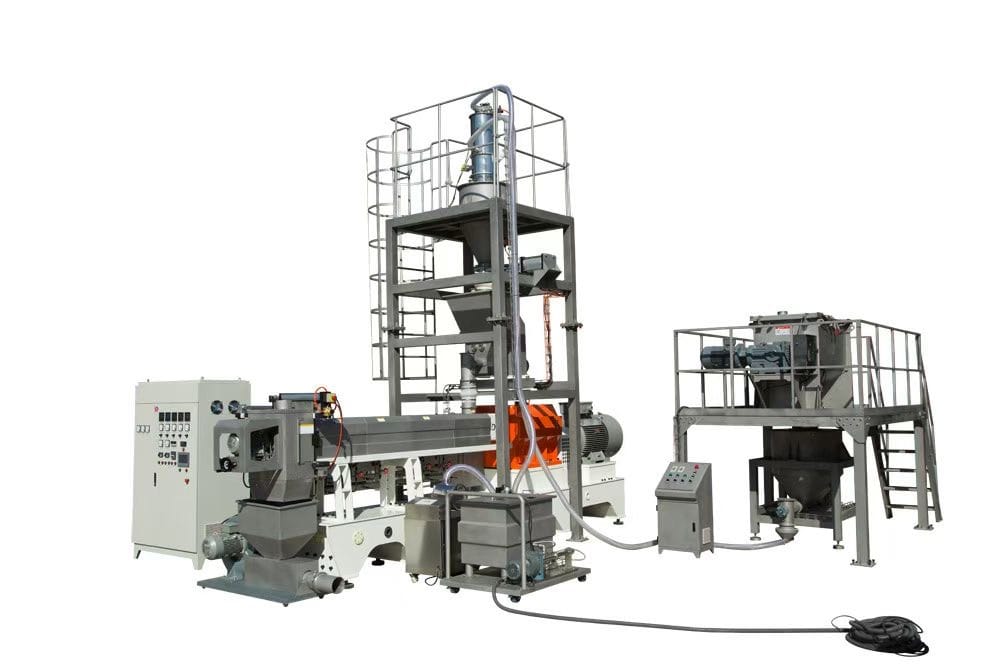
Proper cleaning of an extruder is critical for maintaining product quality, ensuring food safety, preventing cross-contamination, and extending equipment life. extruding machine Here is a systematic, safe, and effective cleaning procedure.
1. Safety First – Pre-Cleaning Protocol
- Lock Out / Tag Out (LOTO): Fully disconnect the extruder from all power sources (electrical, steam, air).
- Cool Down: Allow the barrel, die, and screws to cool to a safe handling temperature (<50°C / 122°F) to prevent burns.
- Personal Protective Equipment (PPE): Wear heat-resistant gloves, safety glasses, steel-toe boots, and protective clothing.
- Remove Residual Product: Run the feeder and extruder empty (if possible) to purge most residual material before shutdown.
2. Step-by-Step Cleaning Procedure
A. Die Head and Front-End Assembly Removal
- Release Pressure: Slowly loosen (do not fully remove) die bolts to release any residual pressure in the barrel.
- Remove the Die: Once pressure is released, fully unbolt and carefully remove the die assembly. The die face often has baked-on material (“die butter”).
- Remove Front Vent Ports & Stuffers: Disassemble any vent ports, liquid injection sleeves, or other front-end attachments.
B. Die and Front-End Cleaning

- Soak: Submerge die plates, inserts, and parts in a hot water + food-grade detergent solution to loosen deposits.
- Dry Ice Blasting / Soft Abrasive Cleaning: For stubborn polymerized deposits, extruding machine use dry ice blasting (non-abrasive, residue-free) or plastic scrapers. Avoid steel brushes or tools that can scratch critical surfaces.
- Rinse & Sanitize: Rinse thoroughly with hot water, then sanitize with a food-grade sanitizer (e.g., peracetic acid, chlorine-based solution). Allow to air dry.
C. Barrel and Screw Cleaning
Two primary methods are used:
Method 1: Dry Purge Cleaning (For Minor Product Changeovers)
- Use a purge material (e.g., rice flour, soy grits, extruder cleanup compound) and run it through the extruder until the discharge runs clear and free of previous product.
- Effective for color or mild flavor changes where a full teardown is not required.
Method 2: Full Teardown Cleaning (For Allergen Changeovers or Sticky Deposits)
- Open the Barrel: Unbolt and carefully open the barrel clamps. Most twin-screws have a hinged or split barrel.
- Remove Screws: Manually or using a screw puller, slide the twin screws out of the barrel. Note: Screws are heavy and fragile – handle with care.
- Manual Cleaning:
- Screws: Use brass or plastic scrapers to remove residue from screw flights and kneading blocks. Soaking difficult sections can help.
- Barrel Internals: Wipe down with hot, soapy water and non-abrasive pads. Inspect for wear or scoring.
- Ultrasonic or Cabinet Washing (if available): For thorough cleaning of small screw elements and parts.
D. Feeder and Ancillary Equipment Cleaning

- Hopper & Feeder: Empty, disassemble, extruding machine and clean with brushes and food-safe detergents. Pay attention to screws and augers.
- Liquid Injection Systems: Flush with hot water and sanitizing solution to prevent microbial growth.
- Cutters: Disassemble blades and housing; clean and sanitize thoroughly.
3. Inspection and Reassembly
- Inspect During Cleaning:
- Check screws and barrel for excessive wear, corrosion, or damage.
- Examine die plates for clogged holes or scratches.
- Ensure seals and gaskets are intact; replace if worn.
- Reassemble in Reverse Order:
- Lubricate barrel seals lightly with food-grade silicone spray.
- Ensure all bolts are torqued to the manufacturer’s specification in a star pattern for even pressure.
- Verify all connections (electrical, fluid lines) are secure before restart.
4. Post-Cleaning Sanitation & Verification
- Final Sanitizing Rinse: For food-grade production, perform a final rinse with a approved sanitizer on all product-contact surfaces.
- ATP Swab Testing: Use an ATP monitoring system to verify the absence of organic residue on screws, dies, and barrel surfaces. A passing score (<50 RLU typically) confirms cleanliness.
- Air Dry: Allow all parts to air dry completely before reassembly to prevent microbial growth.
5. Cleaning Frequency & Strategies
- Minor Changeover: Dry purge or quick disassembly (every 8–24 hours of runtime).
- Major Changeover: Full teardown (between different products or allergen-containing runs).
- Preventive Maintenance Cleaning: Complete disassembly weekly or bi-weekly, depending on usage.
6. Pro Tips for Efficient Cleaning
- Clean Hot, But Not Too Hot: Purging or disassembling while the extruder is slightly warm (but safe) makes polymer removal easier.
- Organize Hardware: Use magnetic trays or compartmentalized containers for bolts and small parts.
- Document Procedures: Follow SOPs and checklists to ensure no step is missed, especially in allergen-controlled environments.
- Invest in Cleaning Tools: Non-abrasive scrapers, dry ice blasters, and portable steam cleaners drastically reduce downtime.
- Train Your Team: Ensure all operators are trained in safe LOTO, handling of heavy parts, and cleaning chemistry.
A disciplined and thorough cleaning routine for your extruder is not just a maintenance task—it is a critical food safety and quality assurance practice. By integrating systematic teardown, proper tools, verification testing, and team training, you can minimize downtime, prevent contamination, and ensure consistent product quality batch after batch. Always prioritize safety and consult your extruder manufacturer’s manual for model-specific guidelines.
Leave A Comment