Demystifying the Machine: A Step-by-Step Guide to Operating a Twin-Screw Extruder
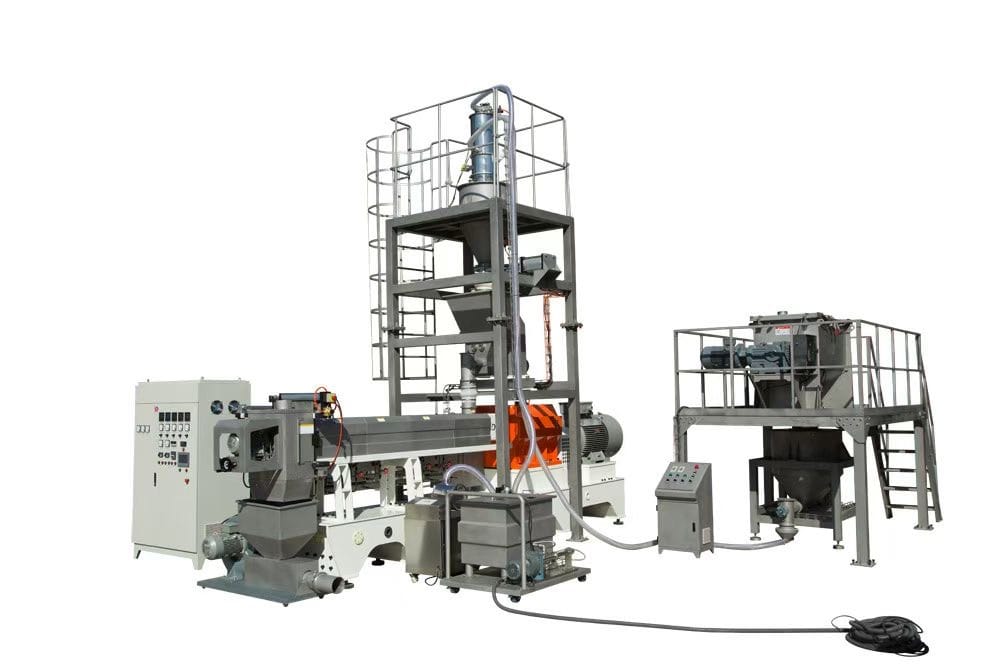
Forget the image of a simple grinder. Operating a modern twin-screw extruder is akin to conducting a high-performance orchestra of mechanical, thermal, and chemical forces. machine extruder It’s a precise, controlled sequence where raw powders are transformed into structured products. Here’s a behind-the-scenes look at how it’s actually done.
Phase 1: The Foundation – Setup & Preparation
Before the first switch is flipped, the operation begins with meticulous preparation.
- The Recipe & Screw Configuration: The operator starts with a specific product “recipe.” This dictates the modular screw profile—the specific arrangement of conveying, kneading, mixing, and restricting elements threaded onto the screw shafts. A breakfast cereal screw will look different from a textured soy protein screw. The correct profile is assembled like a custom toolkit for the job.
- Installing the Die: The shaping die—which could create star shapes, pellets, or sheets—is securely mounted to the end of the barrel. machine extruder This final element defines the product’s shape and creates crucial backpressure for cooking.
- Pre-heating & System Check: The independent heating/cooling zones along the barrel are set to their target temperatures (often via a digital control panel). The system is brought to a “ready” state while checks are performed on ancillary systems: the dry ingredient feeder, liquid injection pumps, and the main drive motor.
Phase 2: The Start-Up Sequence – Building the Melt
With the machine prepped, a careful start-up procedure is followed to avoid damage.
- Initiating Rotation: The main drive is started, and the twin screws begin rotating at a low, preset RPM (Revolutions Per Minute). Initially, they turn empty or with a benign start-up material.
- Engaging the Feeders: The primary dry feeder is activated. machine extruder Ingredients like flour, starch, and protein powder begin flowing into the feed throat at a controlled rate (kg/hr). The intermeshing screws efficiently grip and convey this material forward into the heated barrel.
- Forming the Dough: In the first few barrel sections, mechanical energy from the screws (shear) combines with conductive heat from the barrel. This plasticizes the mix, melting starches or proteins into a hot, dough-like mass. Operators monitor motor torque and pressure gauges closely here, as the melt builds.
- Introducing Liquids: Once a stable melt is established, liquid ingredients (water, oils, flavors, colors) are injected into the dough via precision pumps through designated ports. The intensive mixing action of the kneading blocks instantly disperses these liquids.
Phase 3: The Reaction Zone – Precision Cooking & Venting
This is the heart of the process, where the product’s final structure is determined.

- Kneading & Shearing: The material passes through blocks of kneading elements. The design and stagger of these elements control the shear intensity. machine extruder High shear creates more expansion; low shear yields denser products. This is where texture is “programmed.”
- Temperature Control: Operators don’t just set a temperature; they manage an energy balance. Heat comes from both barrel heaters and the mechanical energy (shear) of the screws. Cooling jackets might even be used in high-shear sections to prevent overheating. The control panel displays real-time temps in each zone.
- Venting (Devolatilization): For many products, a vent port is opened mid-barrel, often under vacuum. This instantly flashes off excess steam or volatiles, allowing precise final moisture control and flavor refinement. Seeing steam being pulled from the vent is a visible sign of this critical step.
Phase 4: Final Shaping & Expansion
The cooked material now moves to its final transformation.

- Pressurization at the Die: The screw profile typically tightens before the die, creating a final seal and building high pressure (often measured in bars or psi). This pressurized, hot melt is forced through the narrow openings of the die.
- The Expansive Moment: As the product exits the die, it experiences an instantaneous pressure drop from high internal pressure to atmospheric pressure. The superheated water within the material flashes into steam, causing the product to expand or “puff.” The operator’s control over melt temperature, moisture, and pressure at this point dictates the expansion ratio and final cell structure.
Phase 5: Post-Process & Control
The operator’s job continues as the product leaves the extruder.
- Cutting: A rotating cutter with adjustable speed blades slices the extruded strands at the die face. The cutter speed determines the final piece size (e.g., the length of a pet food kibble).
- Drying/Cooling/Coating: The hot, moist pieces are conveyed to dryers (for shelf-stability), coolers, and potentially flavor-coating drums. machine extruder The operator monitors product temperature and moisture content at this stage.
- The Continuous Feedback Loop: Throughout the run, the operator is a data analyst. They watch key parameters on the Human-Machine Interface (HMI): Specific Mechanical Energy (SME – a calculated value of motor energy input), die pressure, melt temperature, and motor load. Adjustments are made by fine-tuning screw speed, feed rate, or temperature—not by guesswork, but by interpreting this data to ensure consistent product density, texture, and size.
In essence, operation is not about “turning a crank.” It is the active, informed management of energy inputs (shear and heat), mass inputs (ingredients and moisture), and pressure dynamics to guide a material through a precise physio-chemical transformation. The skilled operator is the master of these variables, bringing a recipe to life, one kibble, flake, or pellet at a time.
Leave A Comment